Friday, December 16, 2011

Egyptian Canopic Jars

Posted by Picasa


Make your own slide show at Animoto.


We've finally finished the canopic jars.  I want to thank the Museum of Fine Arts here in Houston for the inspiration for this lesson.  The teacher CD  they gave during the educator's night was amazing and provided such wonderful images.
Plastic cups, paper towels, tag or cardboard and tape make up the armature for each jar.  Small pebbles are placed in the bottom cup along with wadded up towels to help  balance the jar and to keep it standing. We then covered them with plaster gauze to make the surface strong and ready for paint.   The rest is up to the imagination of the student.  I did provide handouts of Egyptian symbols and patterns for the students to use as a resource.  These were done by my middle school elective class which was actually perfect because they come to art 4 days in a row.  They took us about 2 weeks to complete.  You can see the steps below.


Tuesday, December 13, 2011

Nighttime Paintings


Posted by Picasa
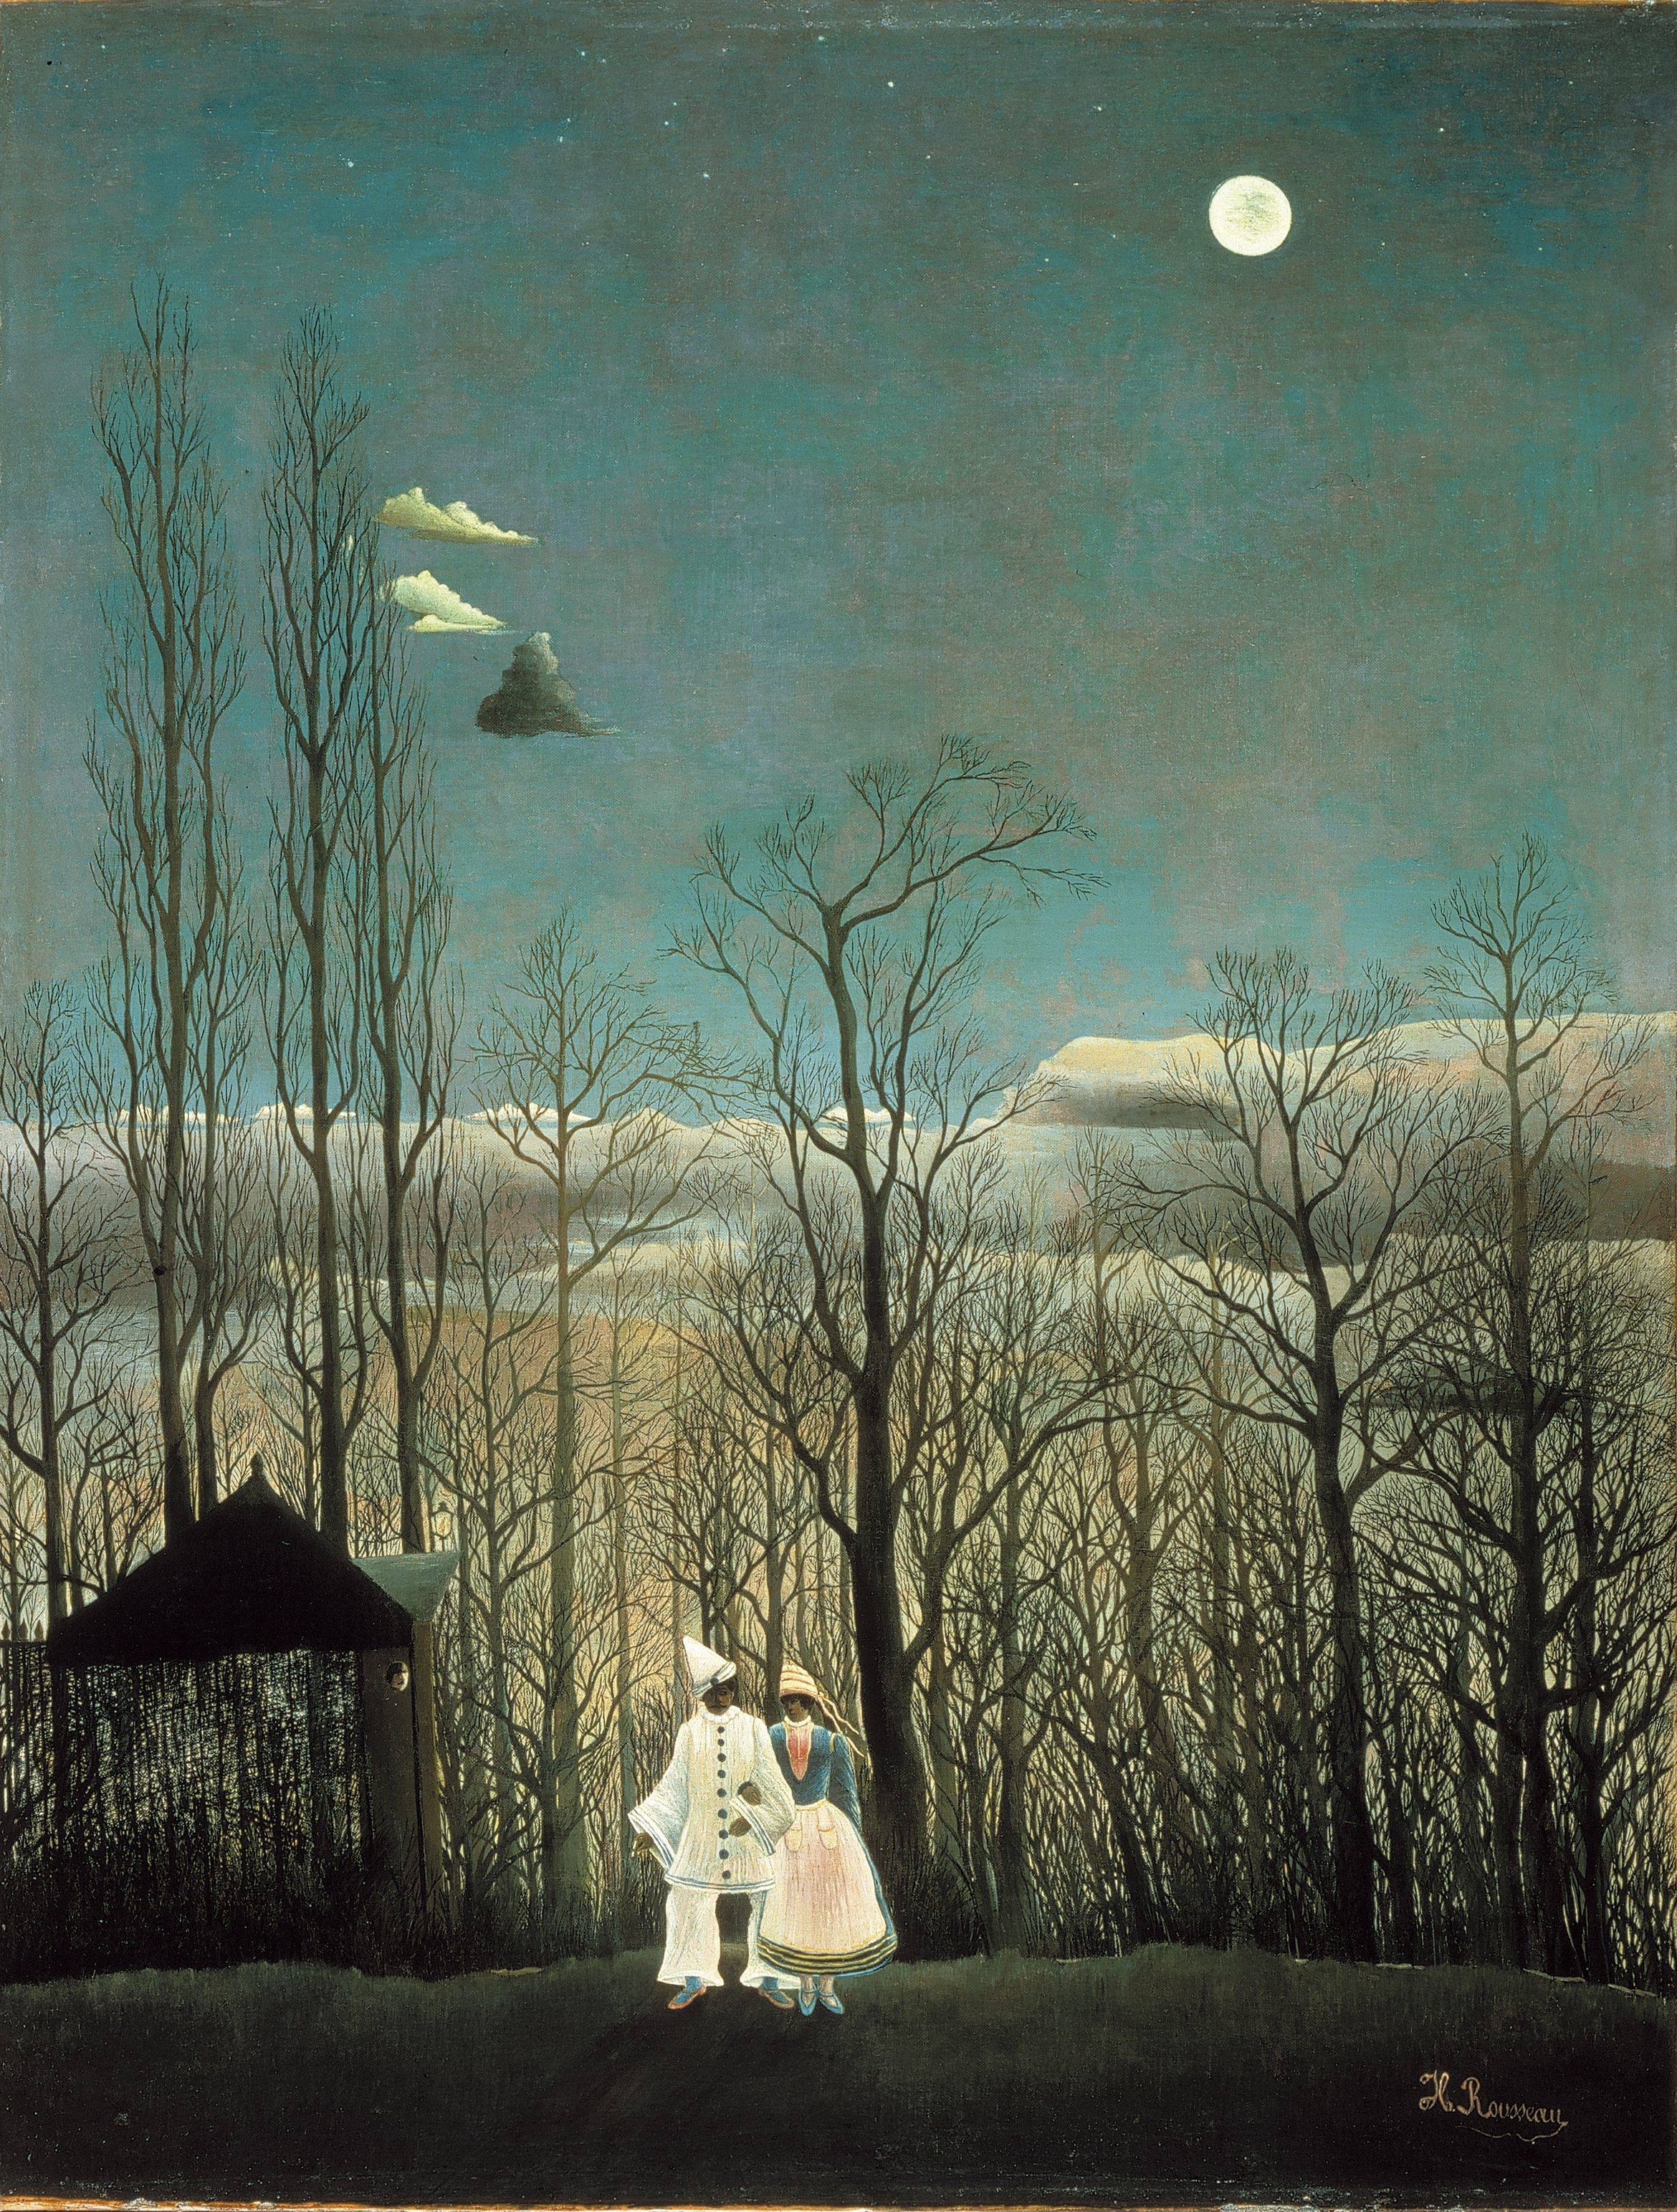
These beautiful nighttime paintings were done by 2nd graders.  We first looked at Henri Rousseau's Carnival Evening (see below). I asked the kids what time of day they thought this way.  As the conversation grew, we discussed what colors made it seem like night, what objects did we see, and what the season may be.  The students also shared  stories of their own nighttime experiences.  We used oil pastels to draw and color in their pictures and  then painted over the entire picture with black paint.  I gave them a second sheet of paper to press over the black paint, smooth with their palm and then "peel" away.  This removes any extra paint and helps to reveal the magical nighttime scene underneath.

Tips*

  • If they take too long with the black paint it will dry.  Demonstrate how to paint over the entire picture quickly (almost with "scribble scrabble" strokes).  I also had them do the scribble scrabble motion in the air with me beforehand just to practice.
  • Some kids will apply too much paint. I walked around with a paper napkin to help them remove any extra paint.  
  • Make sure they use medium pressure with the oil pastels or else the colors may not show up well.

These are 9x12 and took one 45 minute session.


http://upload.wikimedia.org/wikipedia/commons/2/2b/Henri_Rousseau_-_A_Carnival_Evening.jpg

Friday, December 9, 2011

Imperial Robes


I do love teaching and learning about different cultures.  I think art is an ideal means of conveyance for this.  As Renoir said,
"...Flowers are never identical;  it would seem that beauty derives from this very diversity..."
According to Leslie, the girl on the right is frowning because "she's lost in the mountain". 


These imperial robes were made by 2nd graders. Only a few students are finished but I couldn't wait to share this lesson because I'm very excited about the results thus far.  We started off by discussing images of Chinese portraiture.    We identified symbols and discussed why they may have been used.  We also talked about the role of the dragon in Chinese society and how it is a symbol of good luck, power or fortune.  We noticed  the formal pose of the figure, the surroundings,  and the position of the hands and facial expression. The dragon robe is a "cosmic diagram" of our universe.  It reads from bottom to top:  water, land and sky.  You can see a fabulous example here and here.


Detail of robes-

This is the handout  I made representing
Chinese symbols although I  encouraged them to
create their own.


I am also doing this lesson with 6th grade girls but I am going to have them work in groups to actually make a full size model of their robes.  

Mask/Armour- If You Can Dream It, You Can Make It!

Posted by Picasa


These masks/armour pieces were done by my 5th grade boys. I started off by telling them they were going to design some type of armour  (of course this instantly got their attention!) but they could not copy anything from a game, movie, etc.     There design could be for the past, present or future and it had to show all or most of the parts of a suit or armour.  To help them with this I gave them a few handouts that I found  here,  here, and here.  After their designs were complete I told them they were now going to make the head piece  they had drawn. If you look at the pictures, you can see  the ideas came straight from a drawing because most of them are missing  a back panel.   I showed them how to do a basic head band mask and they had to go from there.  Yes, there were many doubts as to their ability to make this happen!  I could only assure them that it was possible and encouraged them to try and fail, try and fail, try something else, and one of those times...it would work!  Voila!

Friday, December 2, 2011

Paper Weaving, Light and Shadows

Love
Posted by Picasa
This book has been a great inspiration for working with paper.  I've actually done quite a few of the projects in it including  pop-ups with index cards (see below).

The weaving project was done by 5th and 6th grade girls.  It really requires a lot of patience and an eye for seeing the unseen.  It's actually quite simple.  You start off with a basic over/under weaving but what adds that element of artistry is envisioning what the paper could become if you pull and crease a certain way.  The shadows created by the lifted paper add yet another dimension.  I did purposely choose a white on white palette so the girls could focus on the space and not the color.  I also should add that I did not suggest for them to create any particular image, it was just about exploring shadows and light.  The discovery of the shapes or words was through their own artistic process...very cool.


Hi


Pop Ups With Index Cards
I would recommend to do the pop-ups with 5th and up.  I tried it with 4th grade but there was a lot of frustration.  I did it with 5th and 6th and they were challenged but they were very happy with their success at the end.  They even started designing their own pop-ups and asked if they could have extra cards to take home.  Both of these projects came from the book above.  


Tuesday, November 29, 2011

Festive Trees

Posted by Picasa
I was thinking about how much I love the simplicity and honesty of Folk Art and it gave me the idea for this holiday tree lesson.
 These were made by Kindergarten students.  It's basically printmaking with a cardboard tool and using your fingers for the ornaments.

Process:

  1. Show them how to make the basic tree shape by creating a mountain or a triangle shape with the cardboard tool.
  2. Use the same cardboard tool to fill in the tree.  I actually have them say all together "press, lift, press, lift".  Otherwise, they may forget and start using the tool like a brush.  Once we say it a few times they remember.
  3. Next, yes, here it comes...finger painting for the ornaments.


Tips:

  • Demonstrate using one finger for each color.  Finish one color of ornament, then move on to the next color, etc.
  • Demonstrate leaving plenty of space for the ornaments,  otherwise, they may fill up the tree completely.
  • These are about 8x10 or so and we finished in one 45 minute class period.  

Tuesday, November 22, 2011

Amate Bark Paintings

Posted by Picasa

Here, the students learned about the amate bark paintings of Mexico.   In amate bark painting the scenes depicted are usually of common everyday activities of the local people.  We talked about what life might be like in a small town or village and tried to put ourselves in that time or place.  


Process:

  1. We looked at and discussed many examples 
  2. sketch out ideas
  3. crumble craft paper and open various times to get a weathered look
  4. pencil sketch onto the paper and trace over with sharpie
  5. we used oil pastels to color in

*tip- leaving some of the color of the craft paper showing has a wonderful feel
* Patterned borders help to unify the overall look
* I randomly cut various sizes of craft paper so the student could choose the size that best fit their idea.


Tuesday, November 15, 2011

Angel Icons

Posted by Picasa

These lovely angel icons were made by my first graders.   Icons were first introduced as a visual language for those who could not read.  They were a way to introduce stories or figures in the form of images.  I showed a few examples of icons throughout history and the kids came up with stories of what a particular icon might suggest.  That was pretty cool because we actually experienced how icons were first used.

Process:
Basic Angel Figure
  1. Directional drawing of basic angel figure (takes 5-10 minutes).  I always say to them to feel free to change or add anything they'd like. 
  2. Color in with crayons.
  3. I passed out gold paint and brushes for them to paint the background.
  4. These are 9x12 and we finished in one 45 minute class period. 
                                                                   

Friday, November 11, 2011

Egyptian Canopic Jar / Sculpture


We've started making canopic jars (or a version of) in my middle school elective class.  So far, the kids have chosen an animal that they feel has characteristics that may portray a godlike or special quality.  We are just starting to build the armatures.  So far, they are really embracing the project, yesterday when I said it was time to clean up it was as if I was addressing an empty room.  About 5 minutes later, I asked why  no-one had started cleaning up one student said, "Oh, you said clean up?  We're just so engaged in our artwork we didn't even hear that!"


Puppets


Posted by Picasa


Can you tell these were all made by boys?!  I find that the 5 and 6 boys can be quite a challenge as far as coming up with lessons that keep their interests high.  I definitely recommend this lesson if you too have that challenge. A, for the freedom to create a character and B, for the sewing.   First they were to create a character that was of their own  design.  They usually want to do something from a video game or a movie.  After a certain amount of "artist's block" they ventured out and came  up with some great stuff.  I also love the sewing part.  There's nothing like a room full of boys learning how to sew, it's as if they are in a trance of some sort.

Yes!  I got the thumbs up on this one!
In hindsight, yes, they're 10 or l1 years old, but they're
even younger at heart.


Steps:

  1. Have them draw their character on a folded piece of large paper.  Make sure the neck starts at the folded edge so it will not come apart later.
  2. Color in with oil pastels.
  3. Have them draw a dashed line to represent where they will cut.
  4. Cut out the character.
  5. Hole punch all along the character.
  6. Demonstrate how to thread a needle and how to do a running stitch.  We used about 4 feet of yarn for each puppet.
  7. Remember to leave about 4 inches of yarn in the back (tape it so it wont move) so you can tie this to the other  end later.
  8. Have them sew.
  9. Tie the two loose ends together on the back.
  10. Now you can cut where the fold is to separate the front and back panels.
                                                                                                          

Tuesday, November 8, 2011

Printing Complimentary Colors and Negative Space

Posted by Picasa


Printing with a cardboard tool is always one of my favorite lessons.  The simplicity is what makes it so open to diversity.  I cut pieces of chip board into about 2x3 or so.  Place one color of paint onto a plate and let the designing begin.  After about 10 minutes I added the complimentary color (I gave them a new piece of chipboard ).   We talked about seeing the energy between the two colors .   About the last 10 minutes of class I passed out small paint brushes and added magenta paint to their plates.  We talked about filling in the shapes or the negative space.  I love the results and my  students did not want to stop...always a good thing!


Thursday, November 3, 2011

Slab Construction Clay Projects, Middle School

Posted by Picasa
 These pieces were all made by hand  with the slab construction technique.  I love that they each have a unique style.  I think this shows that the students are becoming comfortable with the materials and not afraid to explore both the material and their artistic potential.

Tuesday, November 1, 2011

Altered Page


...and we have finally finished! Check out the post below to learn more about this lesson.  

Friday, October 28, 2011

Batik Owls

Posted by Picasa

These lovely owls were done by my 6th grade girls.  To see the  technique, please check out  the sugar skulls from the post below.


Sugar Skulls

Posted by Picasa

A new version of sugar skulls!


  • - I had the basic shape of a skull for them to see.  They drew their own.
  • - Fill in with various lines to create areas for color
  • - Fill in with fluorescent oil pastels
  • - Crumble paper and open (repeat 3 times)
  • - Paint over entire skull with black tempera (the paint will go into the lines to create a batik effect)
  • - Rinse off in the sink with water and a sponge or big brush
  • - Let them dry.
  • They did all the drawing with a pencil first and then traced over the pencil with a Sharpie (they could choose any color(s).
  •                                                               
  •                                                               


Thursday, October 27, 2011

Torn Paper Collage

 
Posted by Picasa    Making a torn paper collage is such an engaging  experience for anyone.  The students learned what it means to tear with the grain of the paper and what it means to tear against the grain of the paper.  They  also  arranged their papers in a way that was pleasing to them as artists.  Some chose to make representational collages while others just had fun exploring tearing the paper with a new insight. This lesson really gets a chance to bloom with two class periods versus one.  On the second day,  I demonstrated how you could add details by layering colors on top of other colors.  This really helped them develop their ideas.  Toward the end of class I showed Frederick by Leo Leonni.  With their new found understanding,  they were able to differentiate which shapes were made by tearing and which were made by cutting...pretty cool.  To see all of the collages, click on the slideshow below!


Create your own video slideshow at animoto.com.


Friday, October 21, 2011

Beautiful Owls!

Posted by Picasa

These wonderful clay owls were done by 2nd  graders.  I especially love how they just dove into adding texture with the tools.  Thank you to  That Artist Woman for the inspiration for this lesson!  I did tweak it a bit though.... I  like to put a bunch of tools on the table and let the kids figure out how they can be used to create the texture versus telling what to do with each one. I find it makes them  explore the materials and make new discoveries.
Here are the steps:
(First I demonstrated the process to the whole class)
  1. I gave them a small piece of clay and they rolled it into a ball. 
  2. Then they squished it down with their palms (just enough to flatten it a bit). 
  3. Then they took the rolling pin to make the oval like shape. 
  4. They  folded over the edges to give the shape of the wings. 
  5. For the head you just fold the top down. 
  6. For the ears they  pulled out the clay. 
  7. For the eyes they used  marker tops.
  8. Texture was added with various tools.  
  9. Some of them decided to add a beak with a small bit of clay.

 Voila!


Happy Birthday!

 
Posted by Picasa

These wonderfully delicious cakes were done by Kindergarten students.  Scroll down to see more about this lesson on a previous post!  I just had to add this new collage of pictures because I love the way they turned out!