Showing posts with label painting. Show all posts
Showing posts with label painting. Show all posts
Thursday, March 21, 2013
Friday, November 9, 2012
Meet the Paintbrush

Kindergarten children have been exploring the paintbrush and painting. They've learned different strategies for controlling the brush and for painting. In some images you will see an exploration of the blob and the outline technique along with different brushstrokes: curved, zigzag, straight, etc. The following week they painted an owl using the strategies learned. Check out our video below to see the artists at work.
Painting with Kinder from Gabriela Elizalde on Vimeo.
Friday, November 2, 2012
Birds
 |
| Sebastian, 4th grade |
 |
| Natalie, 4th grade |
 |
| Kinder-3rd grade artists |
 |
| 4th grade artists |
 |
| Kindergarten artist |

As you can see in some of my previous posts, we've been using a lot of paint lately as we are exploring color and tint making. Although various classes are exploring this, I enjoy posing a different project or challenge throughout the week.
The challenge was to draw a bird, whether make-believe or realistic and paint it with tints. The second day we didn't add white paint to our palette as the pure hues would contrast against the tints. Patterns were added on the third day with markers or paint.
Labels:
2nd grade,
birds,
elementary,
first grade,
kinder,
painting
Wednesday, October 31, 2012
Friday, October 12, 2012
Making Tints


One of the objectives for this lesson was to understand how to make tints. The palette included the secondary colors plus white. They could paint any type of plant life they imagined as long as it was large.
The last day we added gold paint to the background which I feel added an ethereal quality to the paintings.
Friday, February 17, 2012
Beyond Invented Insects


This was an amazing lesson-
Inventing Insects
As they were painting, I encouraged them to name their insect, based on the characteristics. I decided to tap into their musical intelligence by having them compose a sound for their insect. How could that sound be symbolized?
They could map it! (video above) One thing that blew me away was seeing the collaboration among students. Transcending any limitations of spoken language, the map became the tool of communication. And in its use, students traveled from the abstract to the concrete and back again. What a journey!
Friday, February 10, 2012
Inventing Insects
I think insects are such an engaging subject for study. Did you know there are nearly 1 million known species? Ah, but this lesson is not about the known species, it's about the unknown species.
To deepen our understanding of this amazing part of life, I'm planning on doing a few lessons on insects but just vary the media .

great insect source here
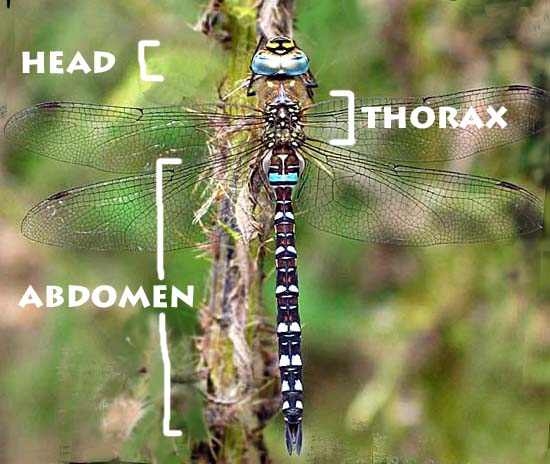
We started by discussing how artists often find inspiration from nature. We looked at images of parks and forests and talked about what you might hear or see there. This led us to the world of insects. Adult insects have the following characteristics: 6 legs, 2 or 4 wings, a segmented body including a head, thorax, and abdomen, antennae, proboscis and eyes.
I demonstrated painting the 3 body parts first and then going back to add eyes, antennae, legs, wings, etc. A wonderfully challenging part of this lesson is for the kids to free themselves up and create a new species of insect. Many of the students also gave their insect an amusing name.
This is one of my favorite sites: Encyclopedia of Life

Wednesday, February 1, 2012
I Give You My Heart

Don't you love how K and 1 students just throw themselves into their art?
It was all smiles and anticipation as soon as the kids saw the enormous Jim Dine heart on my screen.
Today they were going to paint a heart for someone special.

link to Jim Dine source
Process:
- For Kinder, I lightly drew a heart to get them started.
- We looked at Jim Dine's Month of June Hearts and noticed how each heart was just flooded with colors.
- I demonstrated how to paint in a sort of "scribble scrabble" method to fill in the heart and then the background.
- Wait for them to dry about 5 minutes (the kids just kind of waved their pictures around).
- Use the chalk over the paint and blend with your fingers.
Tips:
Limit the colors to about 3, otherwise they may get muddy.
These are 9x12 on watercolor paper.
A wonderful thing about this lesson is exploring the potential of materials. With that said,
use paper that can take a beating because they will keep going and going and...
Tuesday, December 13, 2011
Nighttime Paintings

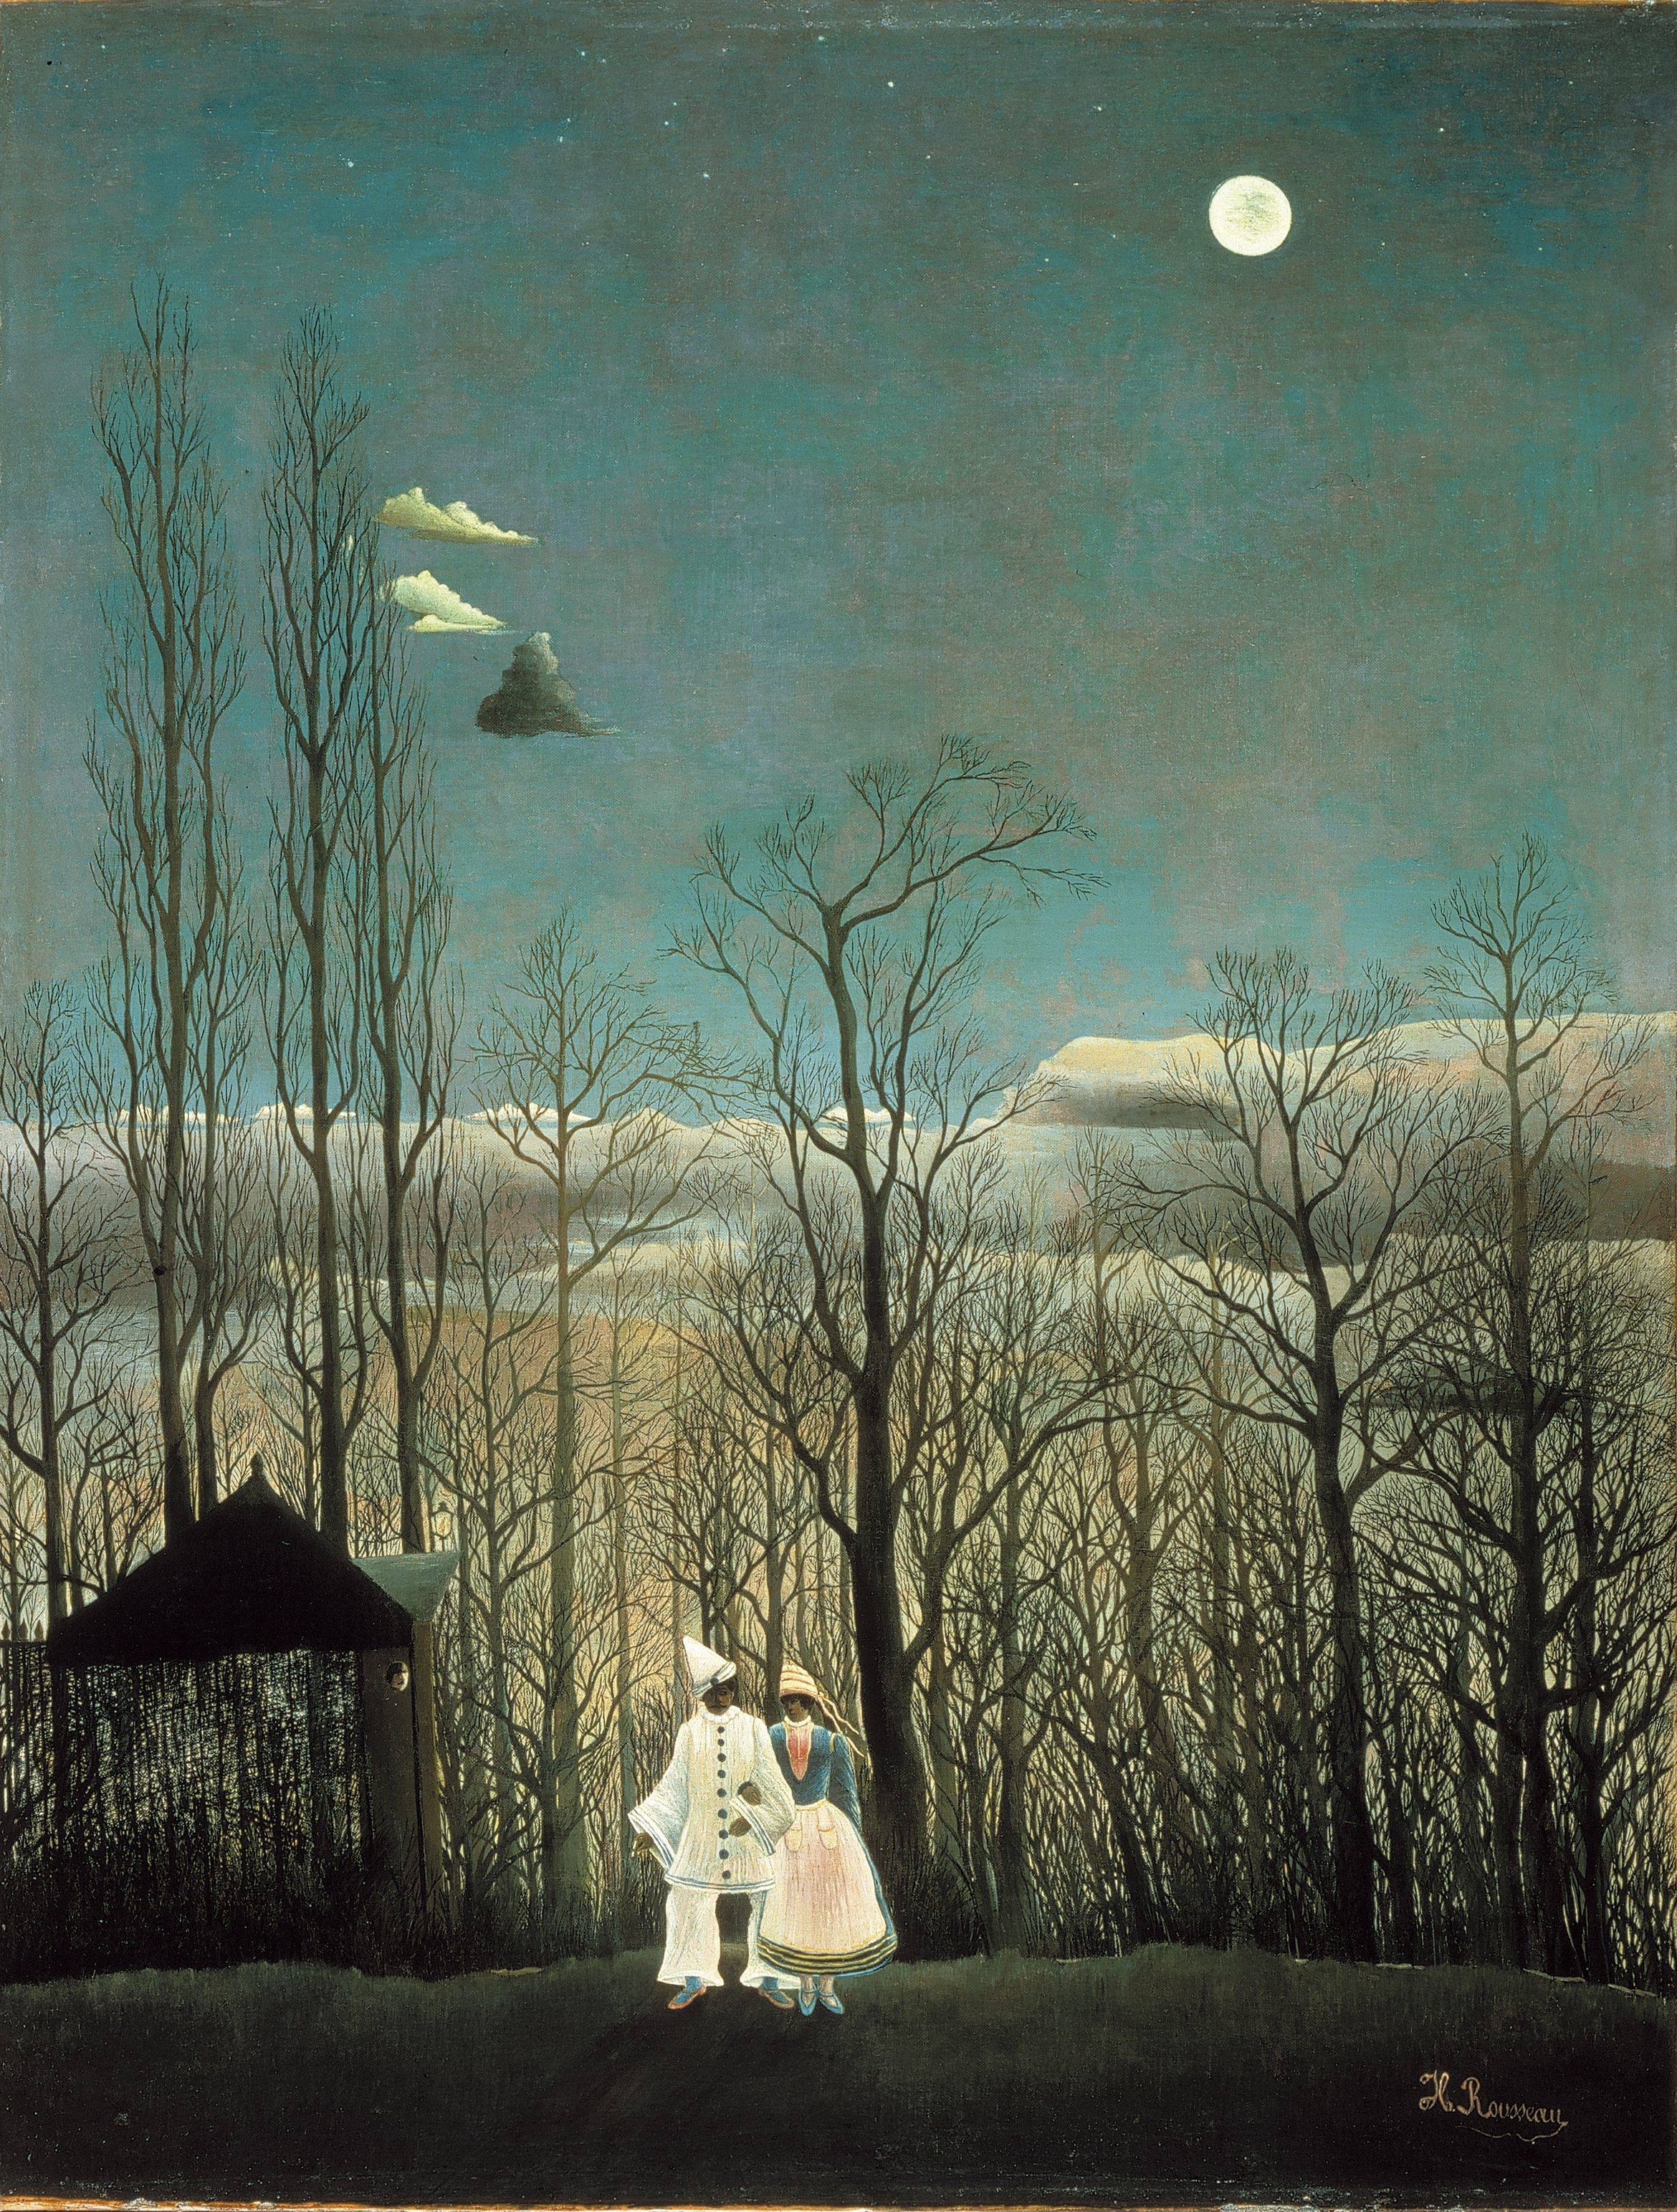
These beautiful nighttime paintings were done by 2nd graders. We first looked at Henri Rousseau's Carnival Evening (see below). I asked the kids what time of day they thought this way. As the conversation grew, we discussed what colors made it seem like night, what objects did we see, and what the season may be. The students also shared stories of their own nighttime experiences. We used oil pastels to draw and color in their pictures and then painted over the entire picture with black paint. I gave them a second sheet of paper to press over the black paint, smooth with their palm and then "peel" away. This removes any extra paint and helps to reveal the magical nighttime scene underneath.
Tips*
- If they take too long with the black paint it will dry. Demonstrate how to paint over the entire picture quickly (almost with "scribble scrabble" strokes). I also had them do the scribble scrabble motion in the air with me beforehand just to practice.
- Some kids will apply too much paint. I walked around with a paper napkin to help them remove any extra paint.
- Make sure they use medium pressure with the oil pastels or else the colors may not show up well.
These are 9x12 and took one 45 minute session.

Tuesday, November 8, 2011
Printing Complimentary Colors and Negative Space

Printing with a cardboard tool is always one of my favorite lessons. The simplicity is what makes it so open to diversity. I cut pieces of chip board into about 2x3 or so. Place one color of paint onto a plate and let the designing begin. After about 10 minutes I added the complimentary color (I gave them a new piece of chipboard ). We talked about seeing the energy between the two colors . About the last 10 minutes of class I passed out small paint brushes and added magenta paint to their plates. We talked about filling in the shapes or the negative space. I love the results and my students did not want to stop...always a good thing!

Friday, October 21, 2011
Friday, September 30, 2011
Animals and Creating Visual Texture
Here, we were still exploring the art element of visual texture. Previously, the students made "texture plates" exploring various ways to create tactile texture. Their challenge in this lesson was to show the animal's skin texture through repetition of certain types of lines or shapes. I placed little plastic figurines at each table to help them with the drawing. I think it helps to see the animal in front of you as opposed to trying to remember what it looks like. That way too, you also get so much variation with the animals they draw. Lastly, they added a patterned border to bring focus to their animal.
Colorful Castles and Color Mixing
Create your own video slideshow at animoto.com.
Subscribe to:
Posts (Atom)


