Showing posts with label collage. Show all posts

Friday, November 1, 2013

Expressive Clay Faces and Much More!


Transdisciplinary  Theme: How We Express Ourselves
Central Idea: Art Is A Way of Exploring The Self

This year we've been working on various lessons that have engaged us in reflective and challenging ways.  We started off by analyzing self-portraits throughout time, trying to understand the message of the lines,colors and shapes.   To go deeper into the process we analyzed abstract sculpture and talked about ways in which a connection can be made between an attitude and a sculpture.  I wanted them to start thinking about how they could create an abstract collage that was a reflection of the self.  The discoveries and reflections were many.   For the next component, I wanted them to work with a completely different medium, clay. They were challenged to shape the clay into an expression of their choice.  After the clay was bisque fired it was now white.  How could color help pull out the expression even further?  They chose a warm or cool color palette for this.  Right now, we are in the process of bringing this now character to life by writing a summary describing the personality.  From there, they will create a mixed media narrative painting.  For this component, we analyzed  Homage To Mary Lou by Romare Bearden. 


Images Discussed


Homage to Mary Lou (The Piano Lesson) by Romare Bearden

Thursday, March 21, 2013

Insects- One Subject, Many Media

Insects provide an engaging subject for study and expression.


1st grade artwork, yes, 1st grade!

When we work with one concept but change the medium, we give ourselves the opportunity to deepen our understanding and make new connections.  


Posted by Picasa

Kindergarten and 1st grade paintings


Kindergarten artwork

Tuesday, October 9, 2012

Dreaming


There are those who look at things the way they are, and ask why... I dream of things that never were, and ask why not?

  Robert Kennedy 


Posted by Picasa


Our color charts were transformed into dreamy landscapes against a night sky.


These are a mix of Kinder, First and Second
They all loved it!

Friday, September 21, 2012

Torn Paper Collage

Ah, tearing, how liberating it feels to tear a brand new sheet of paper straight down the middle. What a sensation- especially  if you're experiencing it for the first time!  That's what Kinder did this week and what a great experience it was.  How charmed we are indeed to be part of those moments!   


Dinosaur
Kinder Student 


Posted by Picasa
Butterfly, Plus Sign and Sky and Butterfly
Kinder Students

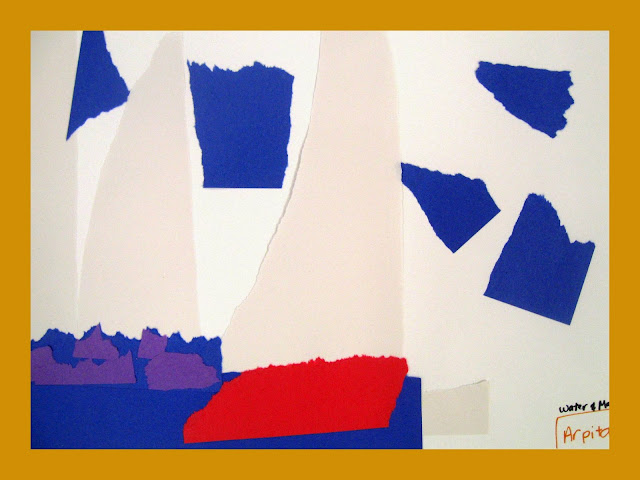
Water and Mountains
Kinder Student


Tuesday, April 3, 2012

Dressing The Part

The Banker
Designer: Clair, grade 3
Posted by Picasa

The Samurai

 Project Runway anyone?
 Challenge:   Choose the appropriate fabrics and construct an outfit for a particular person. We had bankers, fashion models, ninjas, surfers, you name it.  This lesson was both fun and challenging for the students.   Determining which fabrics work best for their character, visualizing what size to cut the pieces and making adjustments were all part of the creative process.  I still have some students working on camouflage outfits!


The Ninja, The Surfer, The Super Hero and The Fashion Model

The Technology Guy
Designer: Conner, grade 4

These are on 5x8 (or so) poster board.  I had small tubs of fabric at each table but they could "browse" the selections from other tables!

Tuesday, March 6, 2012

Collage Characters

Posted by Picasa

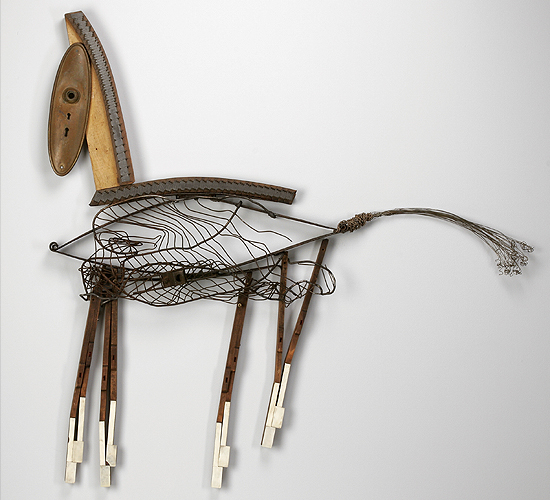
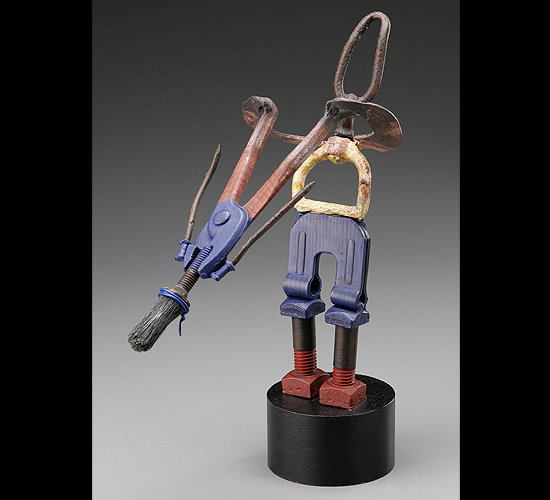
This lesson is about transformation.   The students explore the potential of objects and see them transform into a face, an expression or an emotion.   For this project we incorporated "found" objects to construct the face and to add details to the body.  Can you see the different expressions in each character's face?


 Inspiration came from the amazing art of Nan Fleming seen below.

 Trojan Horse

Flying
Nan Fleming, source


These were made a couple of years ago by K-1 students.  It turned out to be one of my favorite lessons.  I am sharing it now as it applies to my previous post and may give you some more ideas for a collage project and the use of texture plates.

Friday, March 2, 2012

The Way of Collage


There's a wonderful tension that exists between the artist, the mind and paper.  Ah, but when the moment arrives, hands cut, papers fly, imaginations soar.  This is the way of collage.

The collages were made by first making the "material" for the collage and then cutting it to build a character.  Texture plates were used to created the illusion of texture.  The following week we cut the paper into 4  pieces that were used for body parts.  I also placed solid colored paper on the tables that could be used for contrast.
  One of my main goals was for the kids to explore the endless possibilities of this imagined character.   I showed a wonderful piece by  Miga de Pan (link and image below).  I also demonstrated the process of making a character while intentionally cutting free form or odd shapes. This way, the kids could see that it was not necessary to cut a "proper" head, body, legs, etc.


Miga de Pan

Thursday, October 27, 2011

Torn Paper Collage

 
Posted by Picasa    Making a torn paper collage is such an engaging  experience for anyone.  The students learned what it means to tear with the grain of the paper and what it means to tear against the grain of the paper.  They  also  arranged their papers in a way that was pleasing to them as artists.  Some chose to make representational collages while others just had fun exploring tearing the paper with a new insight. This lesson really gets a chance to bloom with two class periods versus one.  On the second day,  I demonstrated how you could add details by layering colors on top of other colors.  This really helped them develop their ideas.  Toward the end of class I showed Frederick by Leo Leonni.  With their new found understanding,  they were able to differentiate which shapes were made by tearing and which were made by cutting...pretty cool.  To see all of the collages, click on the slideshow below!


Create your own video slideshow at animoto.com.


Tuesday, October 18, 2011

Altered Page, Artists as Designers


The 5th and 6th grade girls are working on designing an altered page with a "spooky" mood to it.  Shown above are the steps we are taking.  First,  they were to select words to make a sentence that spoke to them about creating this spooky mood.  This was actually a really fun part because they become so enthralled into finding this perfect sentence which never existed before.  Then,  I gave them a selection of images to choose from which they were to glue onto their board/page.  Then they used the oil pastels to block out the negative space.  They could use the oil pastel however they chose.  The next step was to design a frame or border (we used the scissors with a special edge for this).  The last step is to construct a small envelope and attach it to their piece. I'm encouraging them to invent a new way to make an envelope.  We are not completely finished yet but I wanted to share the work thus far.  I like this lesson a lot because I believe every part has challenged them to a new level.